The Interface
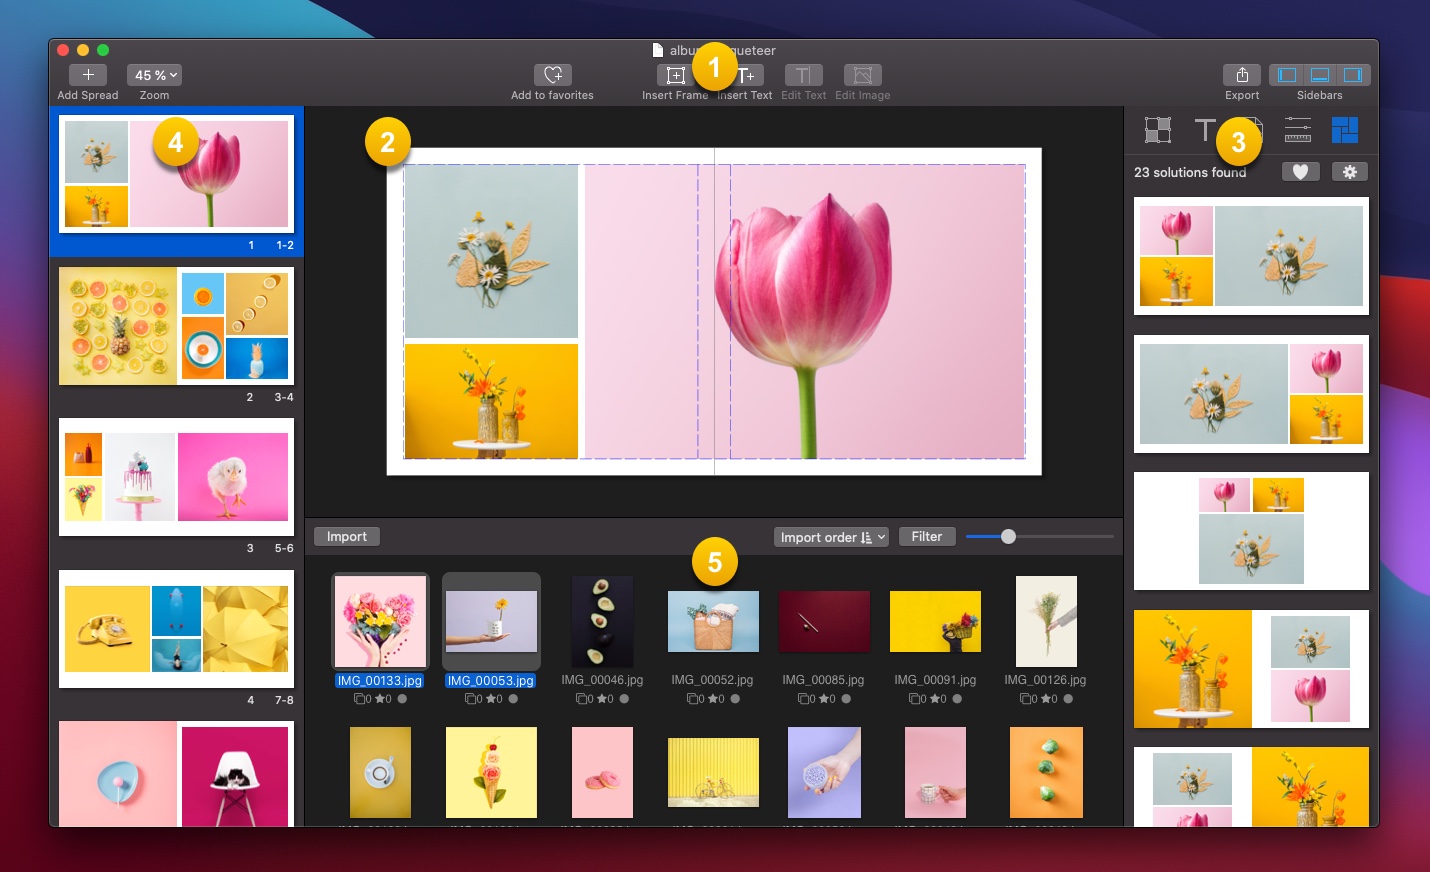
-
The Toolbar: The Toolbar provides quick and easy access to important tools and actions you’ll use a lot in Maqueteer.
-
The Canvas: The canvas is where you visualize, customize, or create from scratch your spread design. It shows the current selected spread.
-
The Inspectors: In the Inspectors, you’ll find settings for any element you have selected, or controls for the tool or feature you’re using:
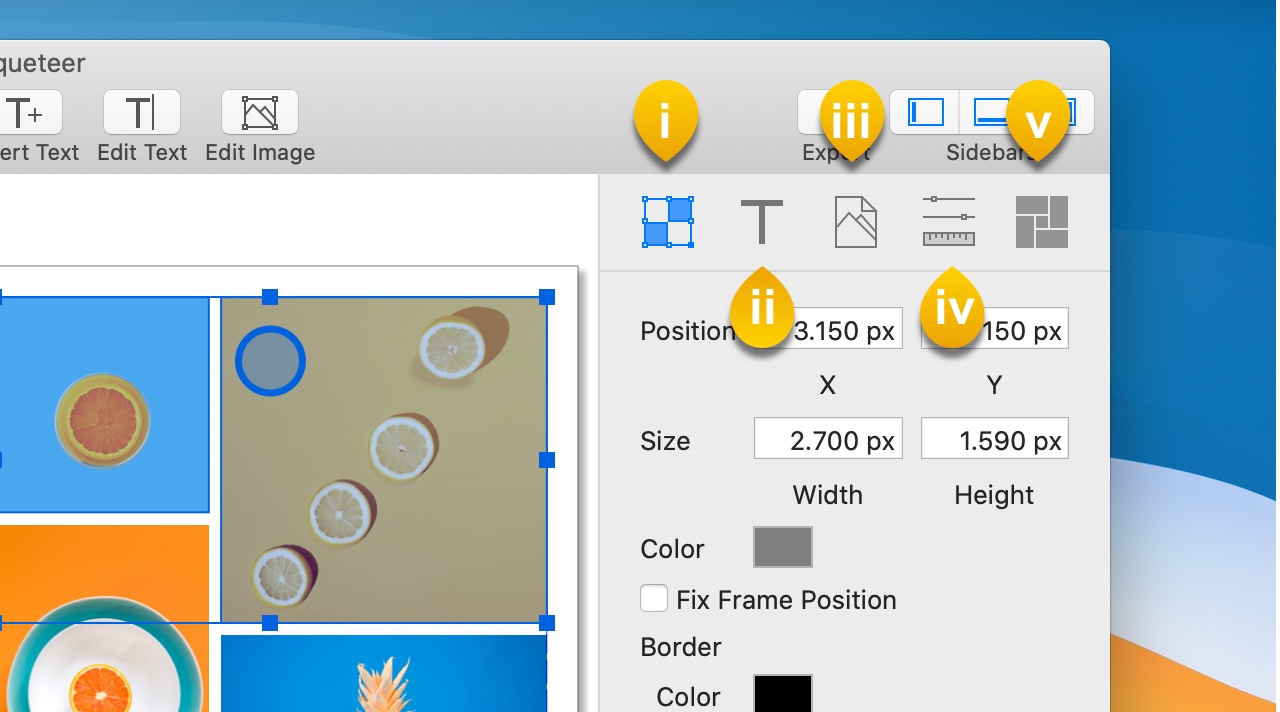
- Properties: The properties inspector contains settings and controls for the current frames selection in the canvas or the spreads selection in the navigator.
- Text: The Text inspector allows you to change the text settings of the current selection.
- Image information: Show useful information of the current image selected in the canvas or in the image browser.
- Document Size: Settings of your album that you can change at any time. Also default settings for the new elements created such as frames or spreads.
- Layout Solutions: At any time, contains up to 100 layout solutions specially tailored for the images contained in the current spread.
-
The Navigator: It contains all the spreads of your album. Here you can select one or more spreads, rearrange them and so on.
-
The Image Browser: It contains all images imported in your project. Most of the time It's the starting point to add images to your album.
The Canvas
How to zoom and navigate the canvas
Zoom:
- Use the pinch gesture to zoom on a trackpad.
- Use the mouse's scroll wheel while holding the "command" key.
-
Use the zoom "drop down" in the toolbar.
-
The are also a few Zoom shortcuts:
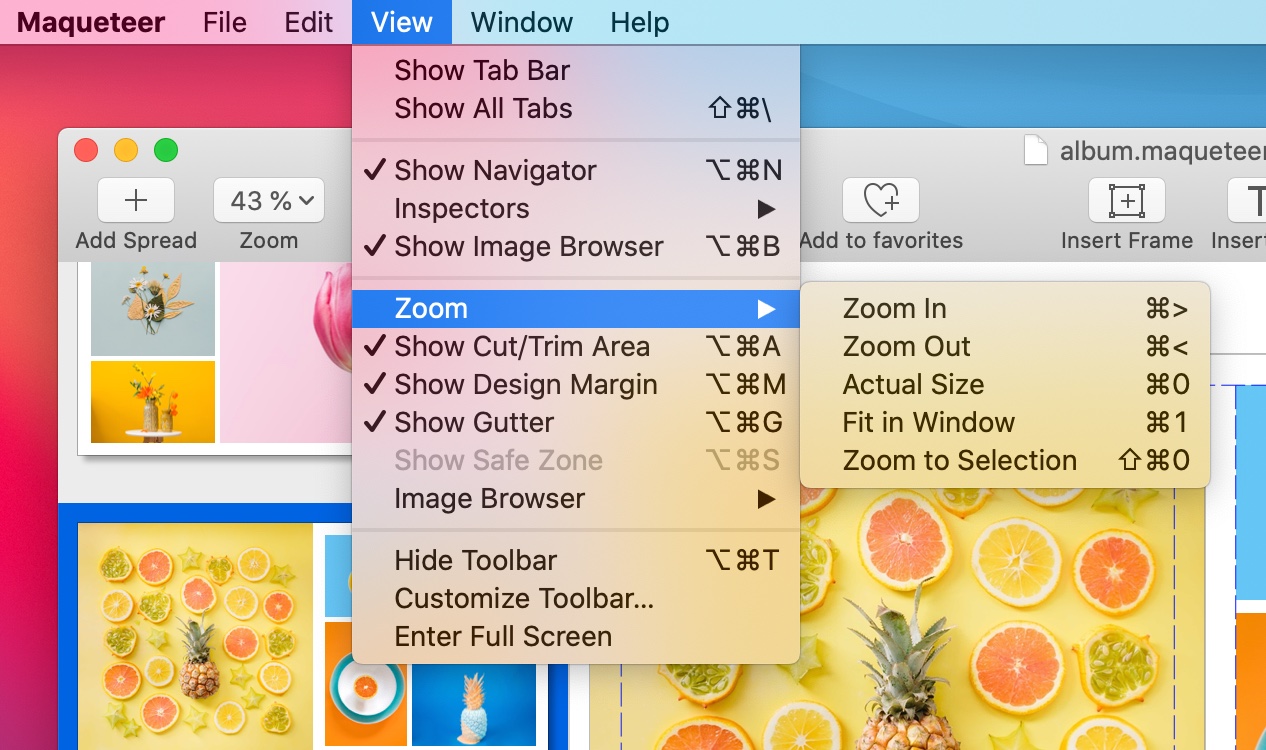
Navigate:
- Use the scroll gesture on a trackpad.
- Use the mouse's scroll wheel to scroll vertically or hold the "shift" key to scroll horizontally.
How to visualize the special guides
You can show or hide the trim area, safe zone, design margin, or gutter from the main menu or using their shortcuts:
The Navigator
The spread navigator is a vertical list of spread thumbnails that appears on the left side of the Maqueteer window in the navigator view. You can click the thumbnails to jump to specific spread or drag them to reorganize your album:
To show or hide the navigator, click the left button in the Sidebars control in the toolbar. Alternatively, use the main menu or their shortcut.
You can resize or collapse the navigator by dragging its right edge:
The spread thumbnails
The spread thumbnails of the navigator contain the number of the spread and the number of each page.
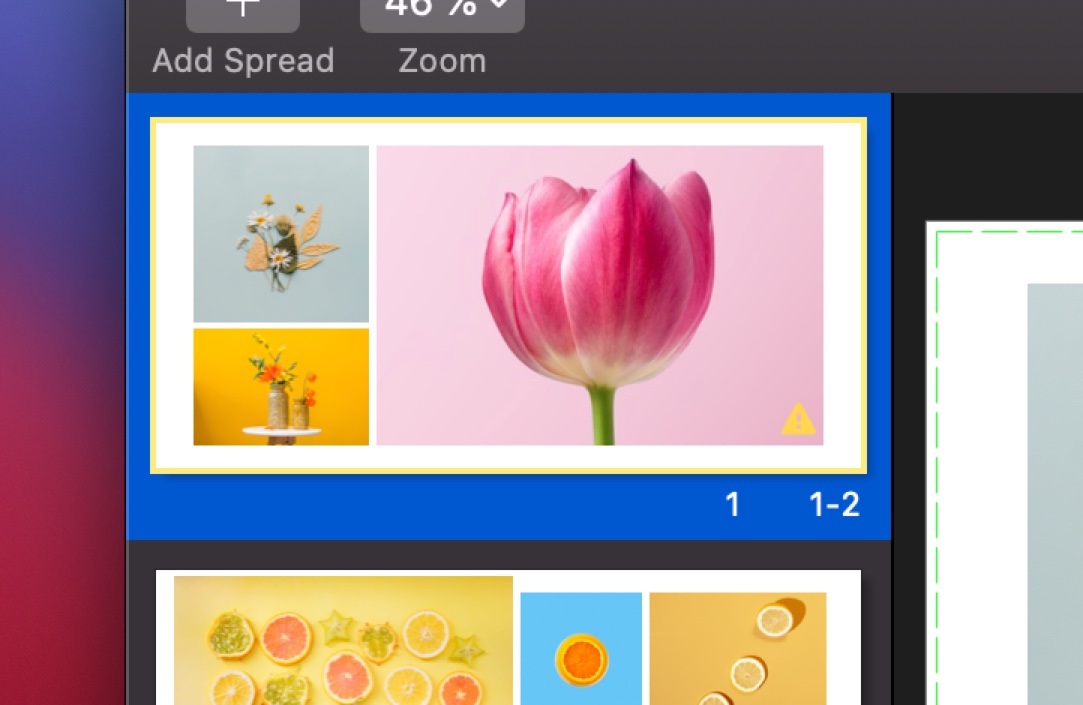
If some image has no enough resolution it displays a yellow warning icon. Also, If the navigator has keyboard focus the selected spreads show a yellow highlight.
The Toolbar
The Toolbar is where you’ll find quick shortcuts to important tools and actions you’ll use a lot in Maqueteer. Here’s a rundown of the toolbar:

- Add Spread: Lets you add a new blank spread in your album, at the end of the last selected spread in the navigator.
- Zoom: Change the percentage of zoom in the canvas or fit in the window automatically.
- Add to Favorites: Save the current layout in the canvas as a favorite so you can reuse it in this album or in another one in the future. (Go to layout solutions to know more about favorite layouts).
- Insert Frame, insert Text, Edit Frame, Edit Text: Give you quick access to common action for editing the frames in the canvas. (Find out more in Spreads)
- Export: Lets you export your album. (Find out more in Exporting)
- Sidebars: Easily show or collapse the navigator, inspector or image browser sidebars.
The Inspector
In the Inspector, you’ll find settings for any frames, images or spreads you’ve selected, or controls for the tool you’re using. The Inspector enables these controls and settings based on what you have selected or what you’re doing.
To show or hide the inspectors, click the right button in the Sidebars control in the toolbar. Alternatively, use the main menu or their shortcut.
You can resize any inspector or collapse dragging its left edge.
The inspector consists of four tabs:
Properties
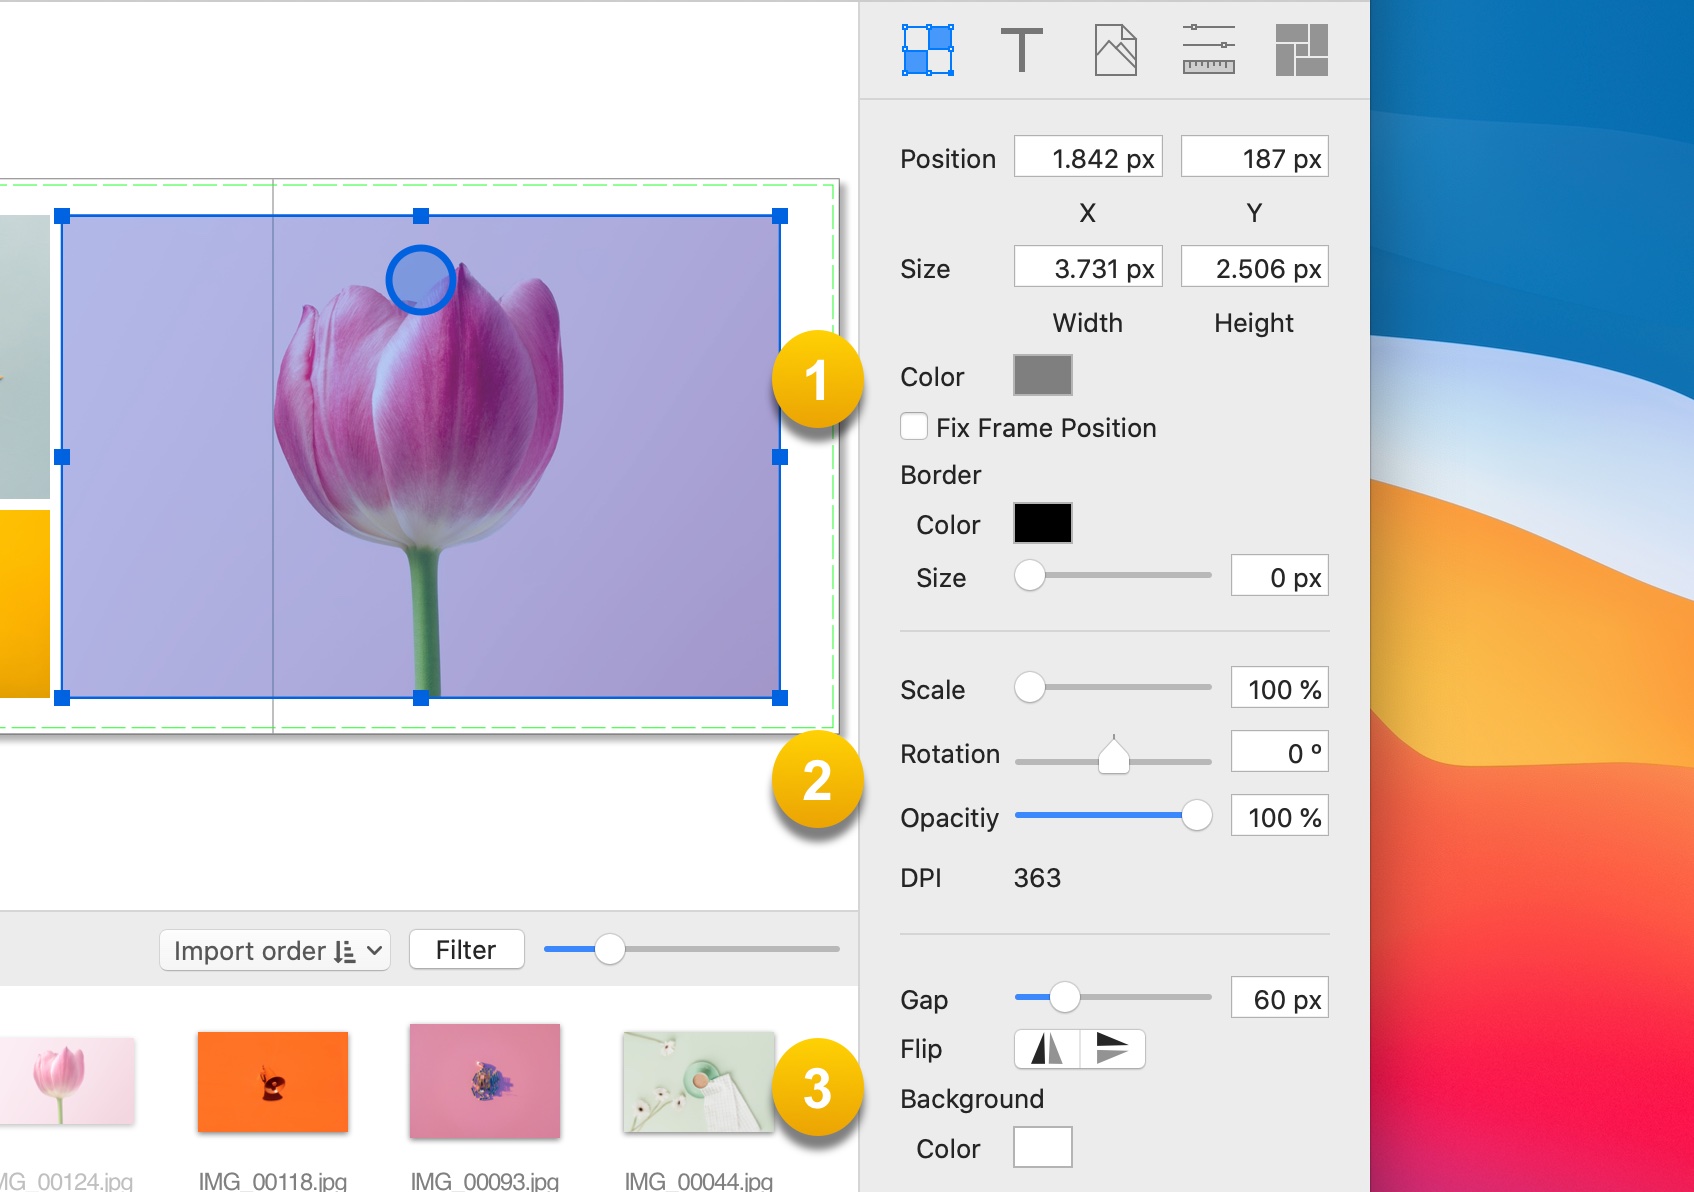
The properties inspector contains settings and controls for the current selected frames in the canvas or the selected spreads in the navigator:
-
Frame properties: These let you change the position, size, color, border and more of your currently selected frames.
-
Image properties: If those frames contain images also let you change its zoom, rotation and opacity.
-
Spread properties: With these controls you can change the gap and background of the spreads as well as flip them.
Text
The Text inspector allows you to change the text settings of the current selected frames. Or if you are editing the text inside a frame, you can control the properties of any part of text you want, just by selecting it:
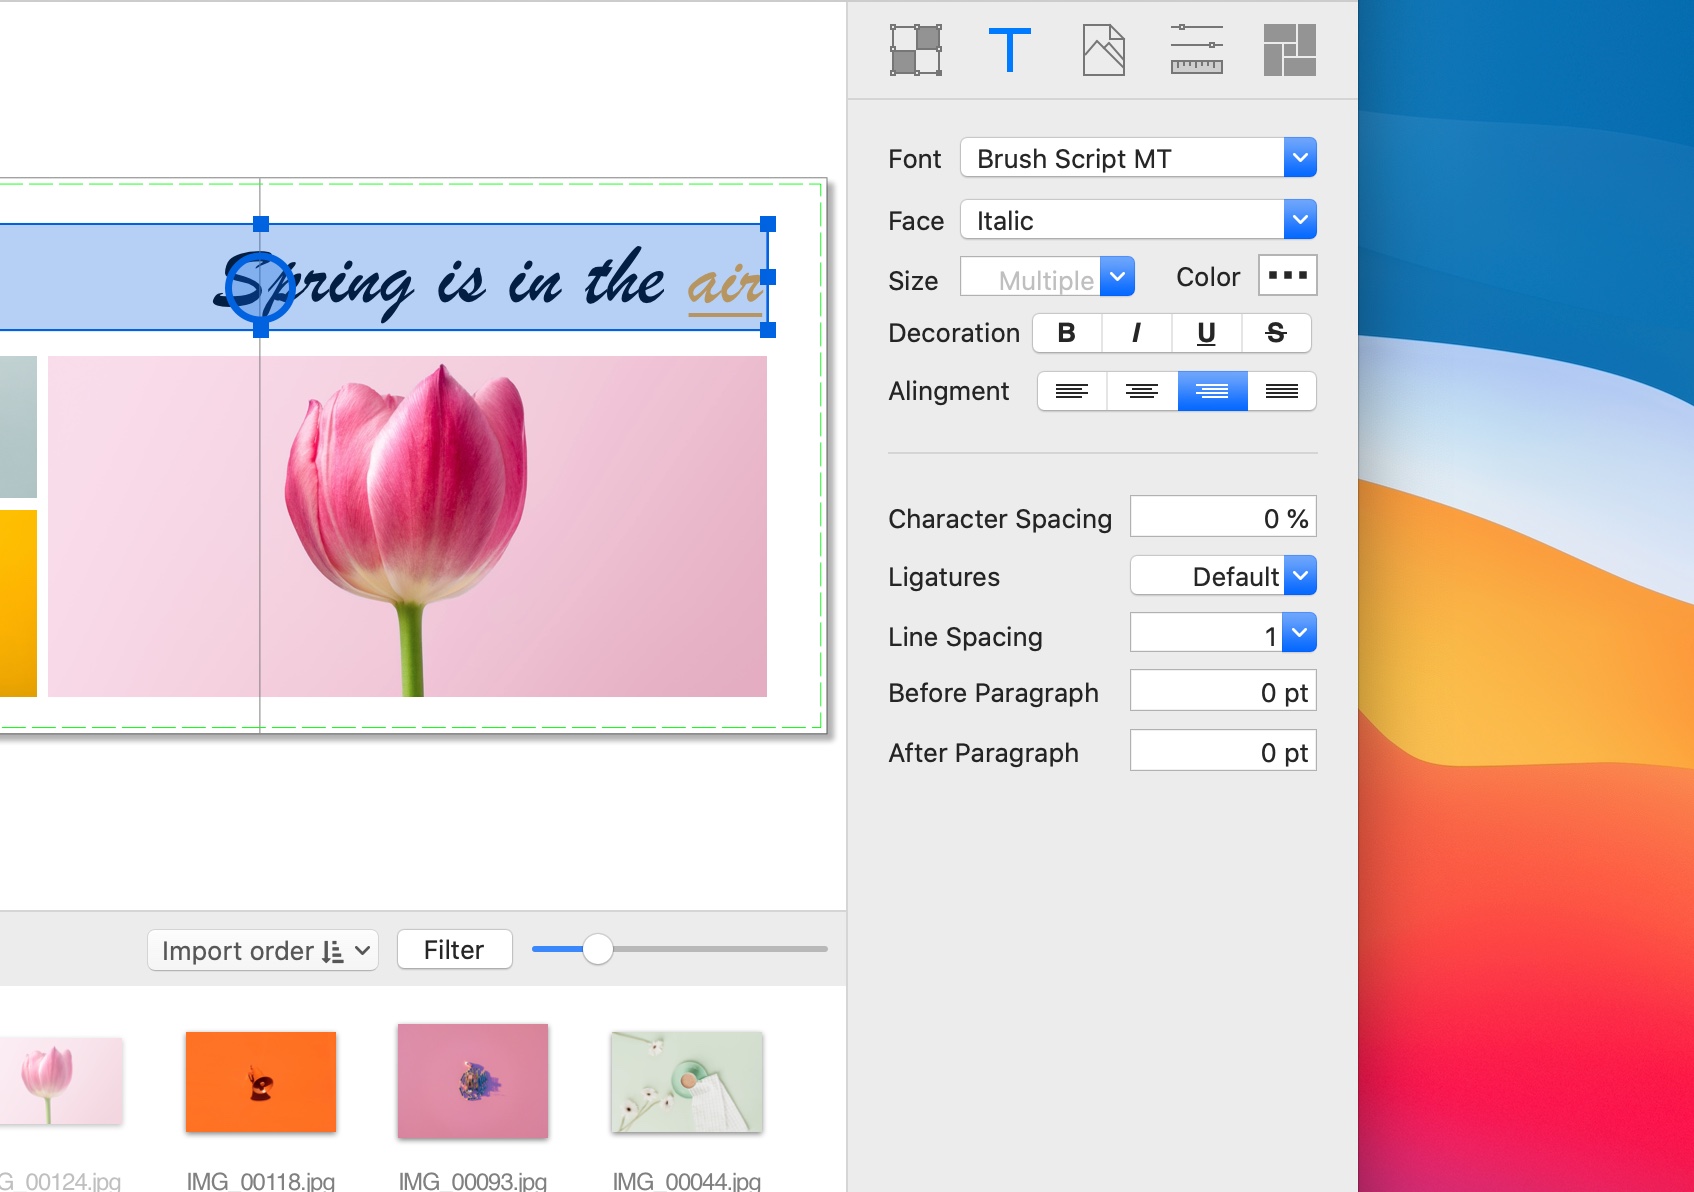
Image Information
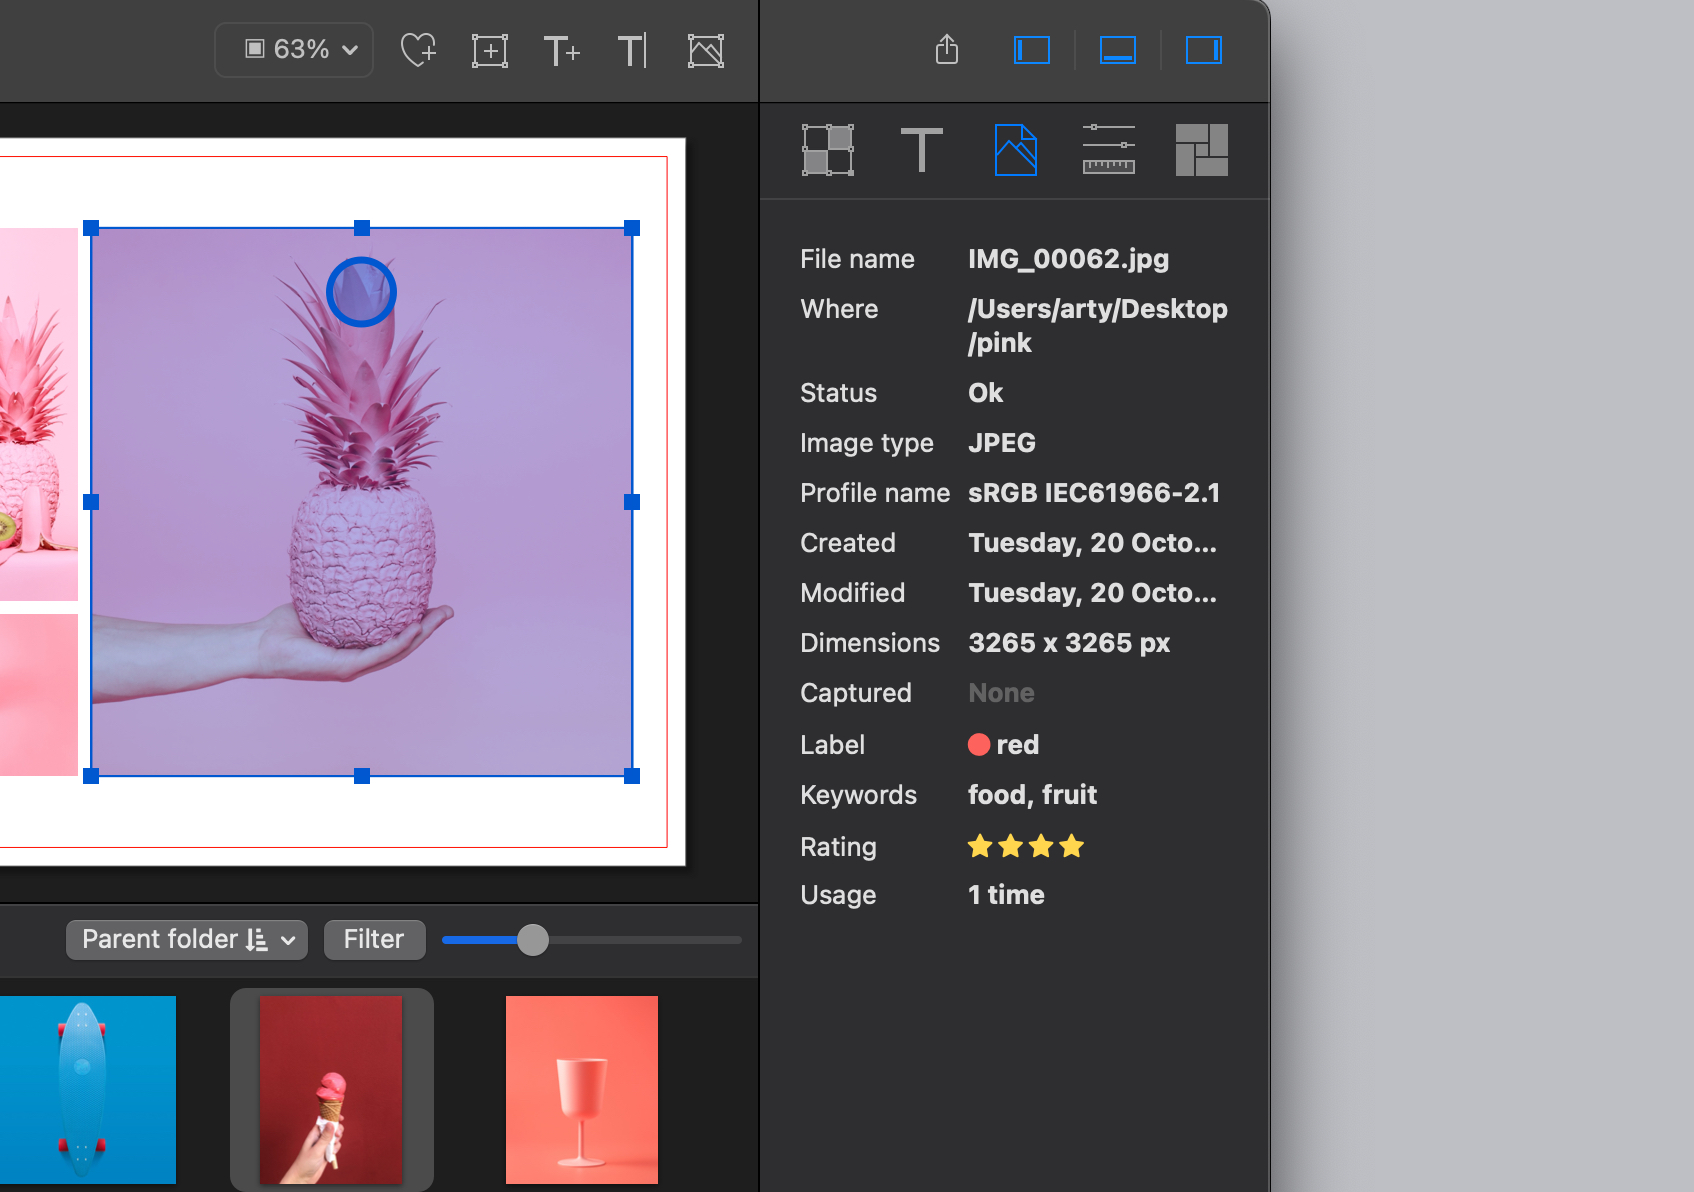
Show useful information of the current image selected in the canvas or in the image browser:
Album Settings
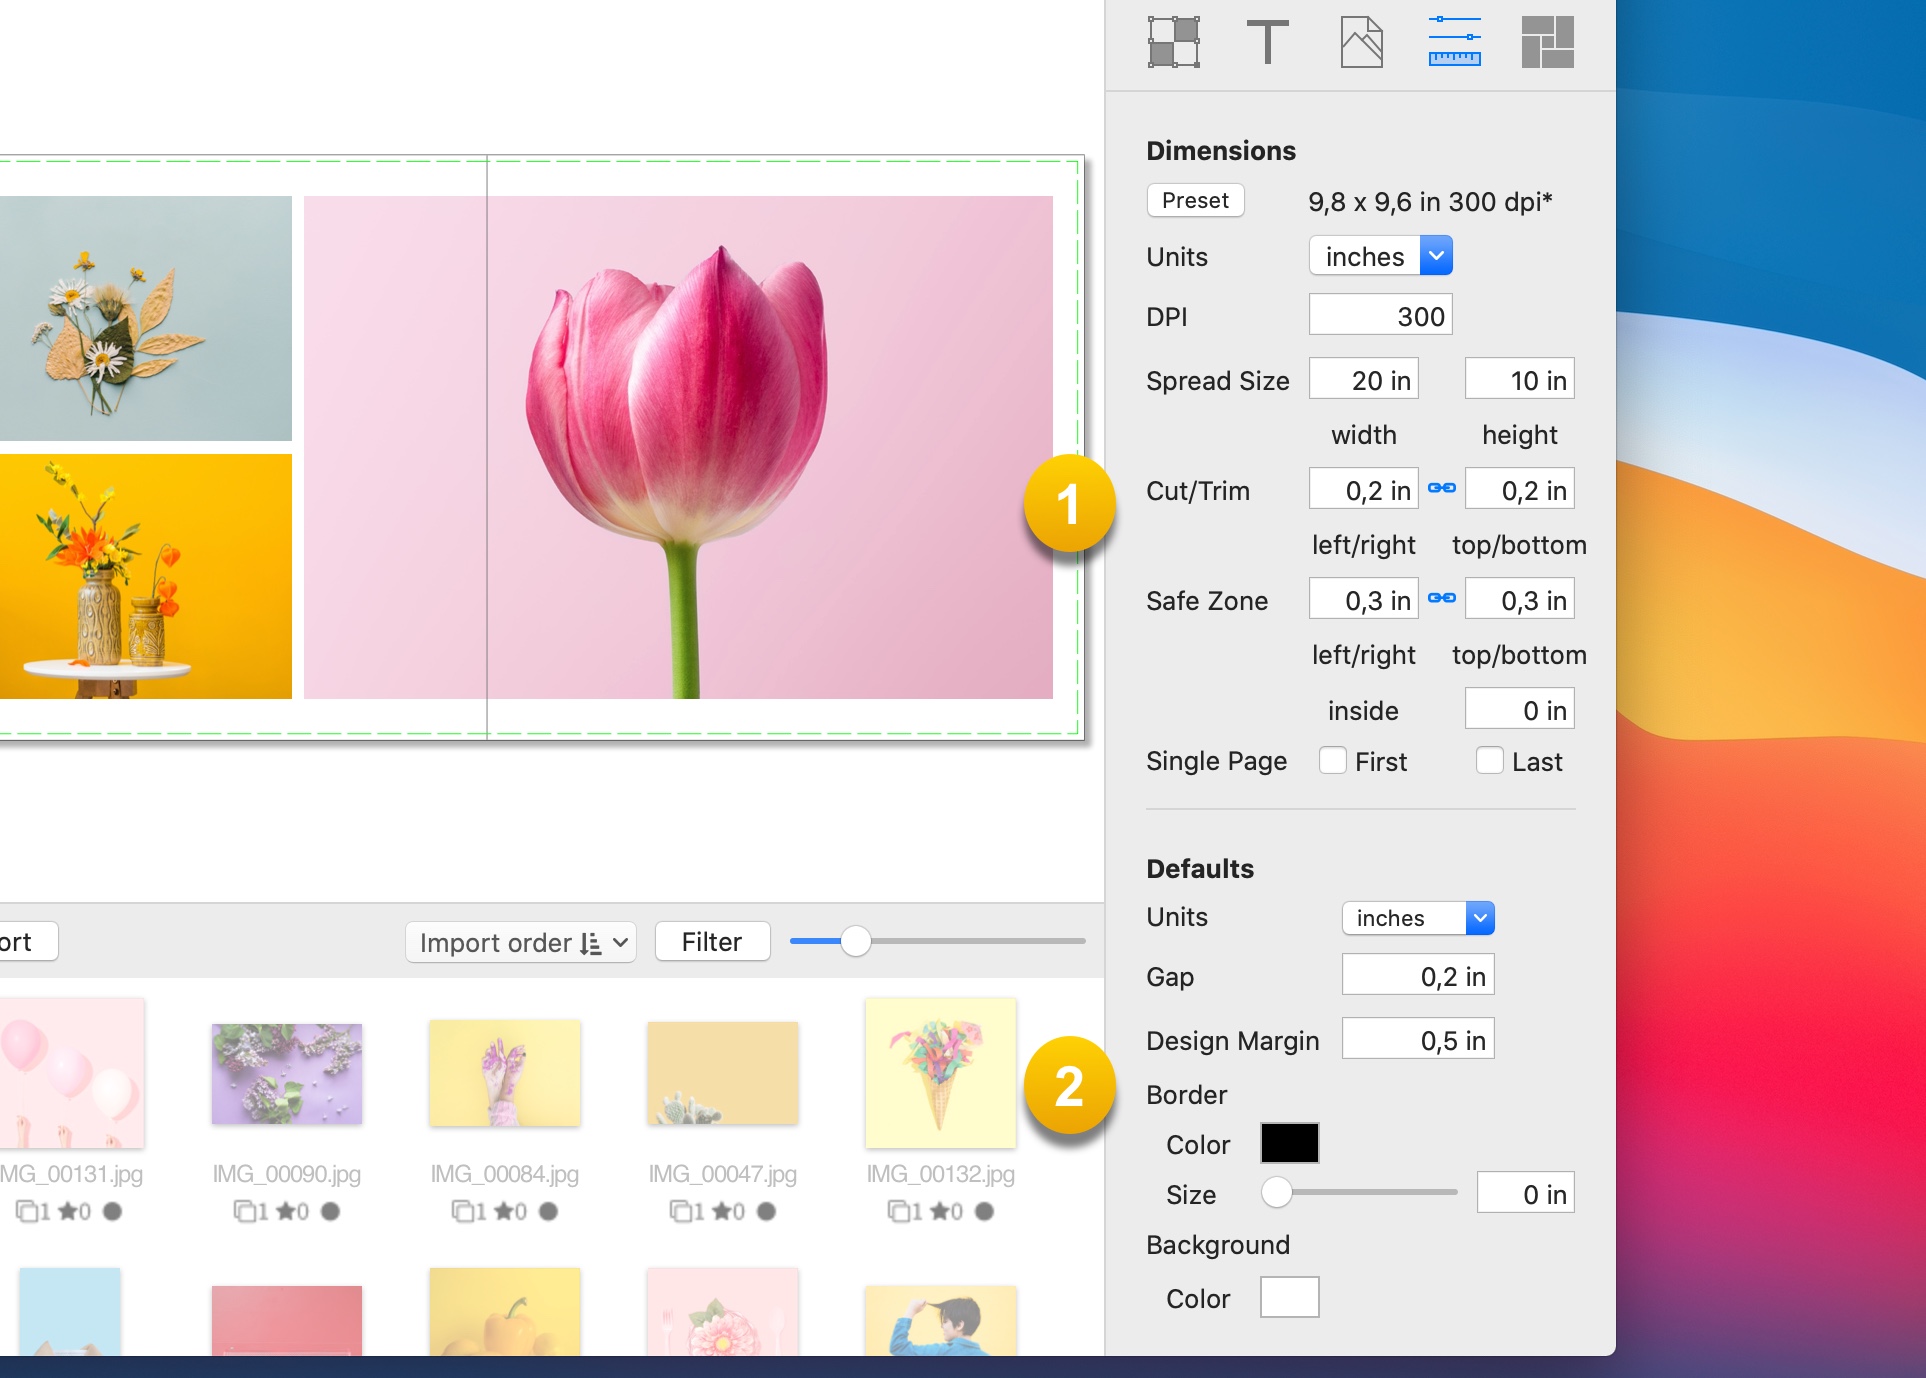
Dimension settings of your album that you can change at any time. Also default settings for the new elements created such frames or spreads:
-
Dimension properties: Let you change the size, cut/trim and safe areas of your album. You can also use a size preset or create a new one with the current settings. (find out more in Album Settings)
-
Default properties: These are the properties that will be used any time you add a new spread or frame to your albums.
Layout Solutions
At any time, it contains up to 100 layout solutions specially tailored for the images contained in the current spread:
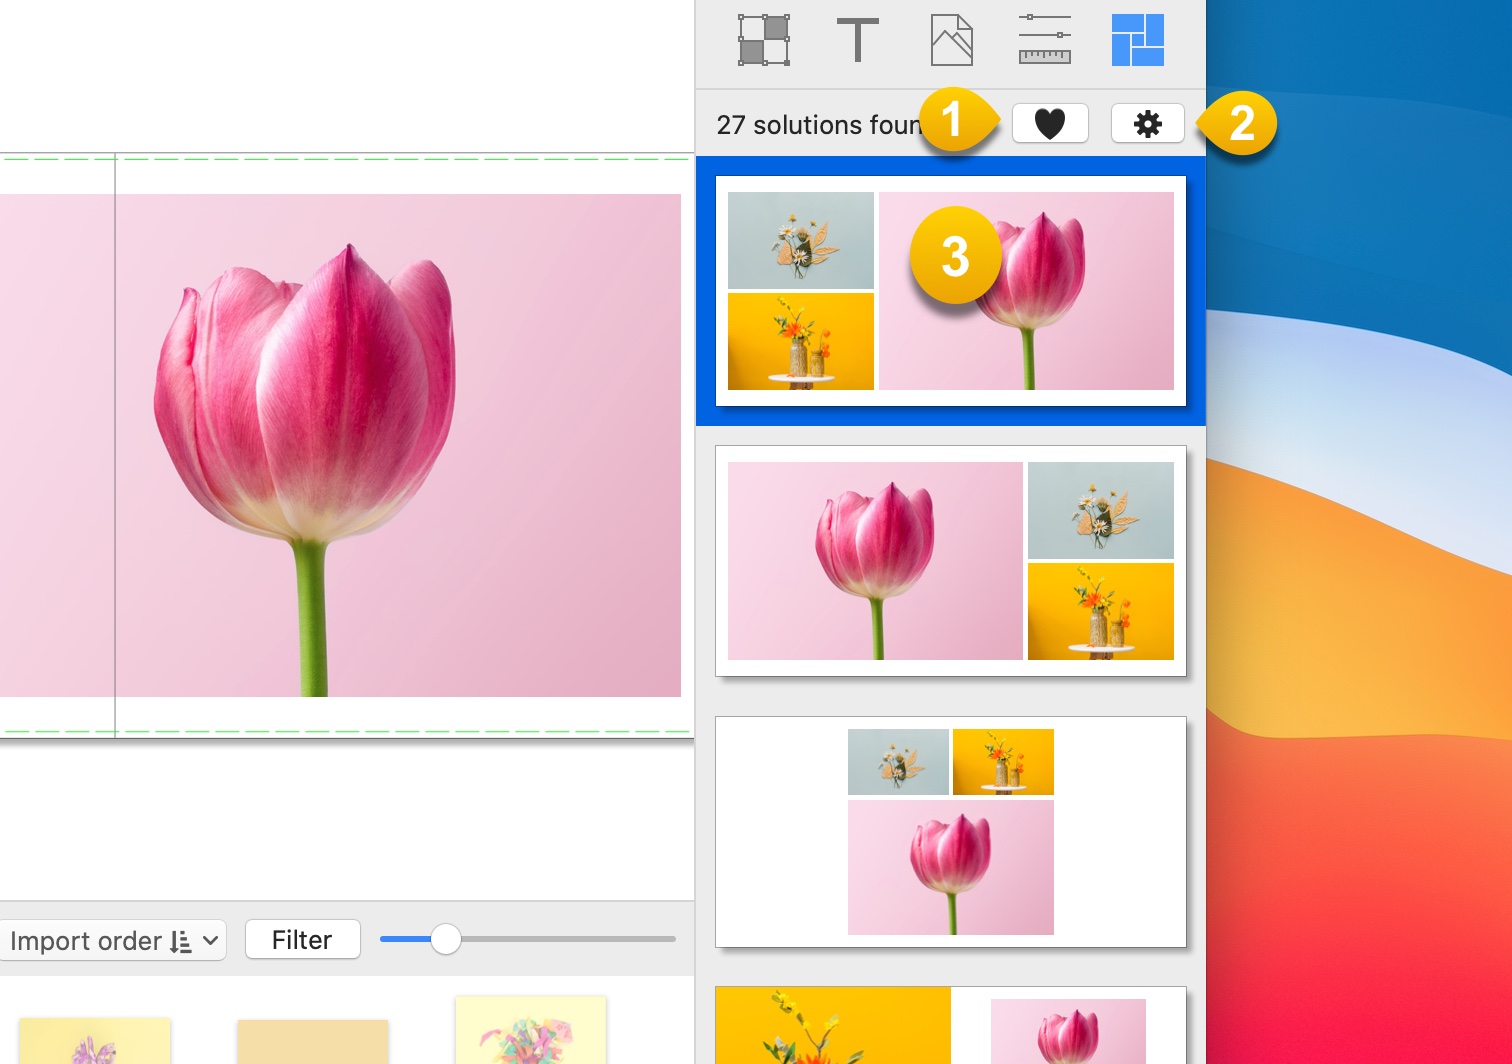
-
Show the favorites solutions that match the number of frames in your canvas.
-
Click to access the setting panel of the solutions.
-
Up to 100 layout solutions. Click the one you wish and the layout will be applied to the current selected spread.
Image Browser
The image browser contains all the images imported to your project.

-
Click Import, to import more images to your project.
-
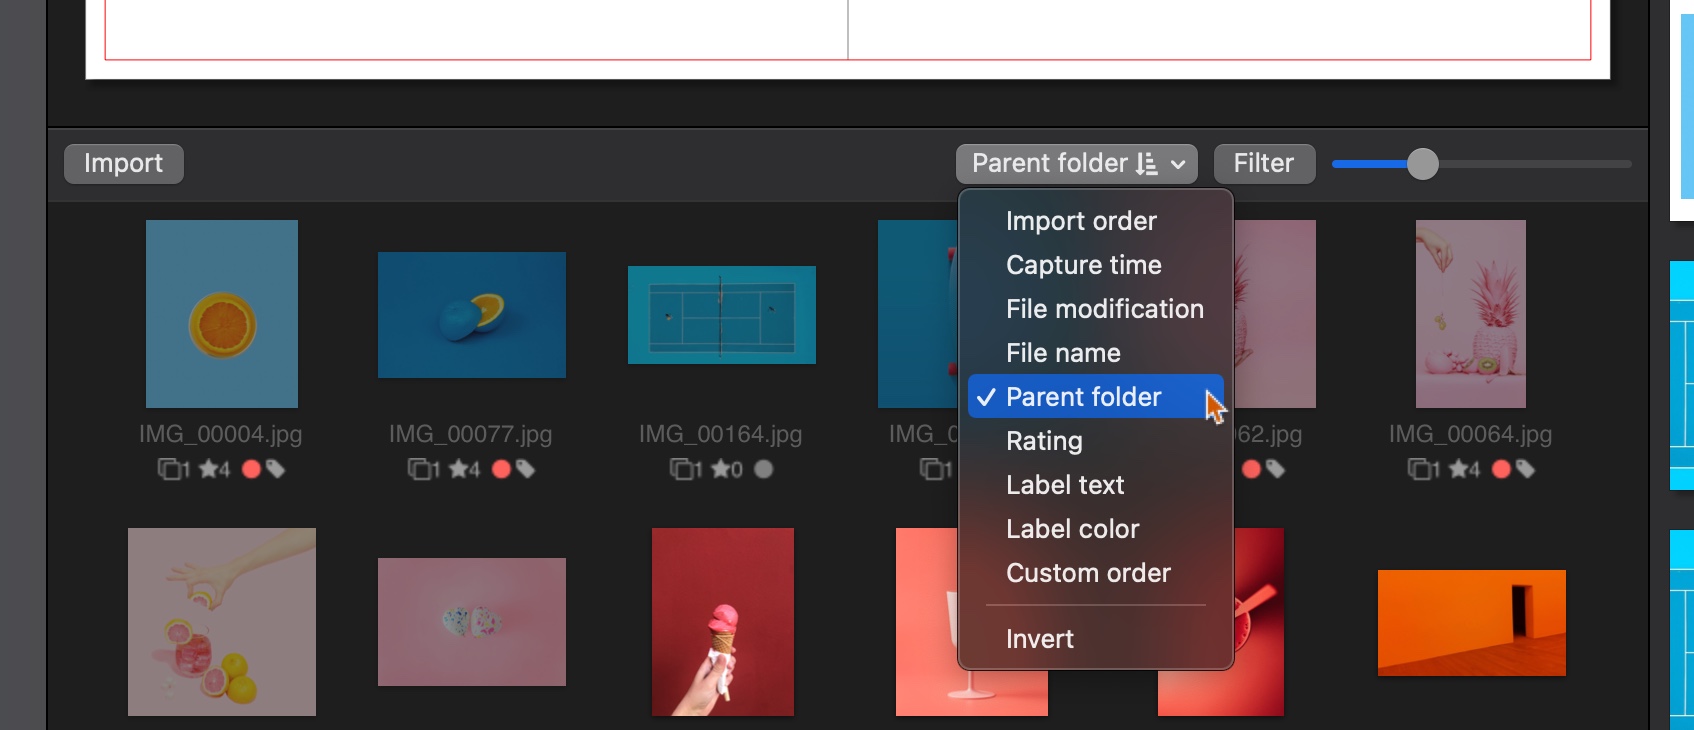
Lets you sort your images in different ways:
-
The filter button gives you the filter criteria available for your images. The options are dynamic and depends on the actual metadata of your images:
You can filter for: usage, issues, labels, parent folders, keywords, rating and capture time. Inside of these categories each criterion shows the number of images that match. To filter just click on the check box of the desired criterion, after that, only the images that have this particular criterion will be shown in the image browser.
You can check more than one criterion to search. Criteria inside a category are cumulative: the images that match any criteria will be shown. Criteria outside categories are exclusive, so the image has to be included in some criterion of both categories.
-
Drag this slider to resize the image thumbnails.
-
Each image thumbnail is composed of the image, a title with its file name and a subtitle with information. You can hide and show the titles from the main menu under view→Image browser.
To show or hide the image browser, click the central button in the Sidebars control in the toolbar. Alternatively, use the main menu or its shortcut.
You can resize the image browser or collapse dragging its top edge.
How to sort your images by custom order
Just select the images you want to change their position, then drag and drop them to a new location in the image browser. The sorting control will change to “custom order”.
Also notice that you can use undo or redo with this operation and your custom order will be remembered when the project is reopened.