Frames
Selecting frames
To select a frame on the canvas, simply click on it. When you do this, you’ll see the selection handles appear around that frame:
Selecting multiple frames
To select multiple frames, select your first frame, hold “Shift” or “Command” and click on another. You can also hold “Shift” or “Command” and click on a frame you’ve already selected to remove it from the selection.
Alternatively, click-and-drag from an empty area on the canvas to select any frames within your selection area.
Holding “Shift” or “Command” while you click-and-drag will add frames to your selection (or remove currently selected frames).
You can also select all of the frames in the canvas, by choosing Edit > Select All in the main menu or using its shortcut “Command”+A.
Moving frames
To move a selected frame or frames, simply click on the little circle and drag it.
Maqueteer automatically aligns the frame(s) you’re moving to the adjacent ones, and respects the gap distance of the current spread in the canvas. If you want to move the frame(s) freely just hold “Command” while you drag.
You can also move a selected frame(s) by using the arrows keys. In this way you'll move by 1px each time. If you need to move faster just hold “Command” while pressing the arrows keys and you'll move by 10px each time.
You can also move a group of frames by selecting them and typing its position in the Inspector.
Resizing frames
To resize a frame, select it, then click and drag on any of its selection handles.
- Handles on the sides of the frame will adjust the height or width.
- Handles on the corners will adjust the height and width together preserving the aspect ratio.
To reverse this behaviour with the aspect ratio, hold “Shift” while you drag the handle.
In any case, holding “Alt” while you drag will resize your selection from the center.
You can also resize a frame by selecting it and typing its dimensions in the Inspector.
When you are resizing a group of frames, the gap configuration of the spread still applies and will be kept.
Duplicating frames
To duplicate the current selection just “Command”-C and then “Command”-V, your selection will be duplicated in place. Alternatively just use the duplicate command in the main menu Edit → Duplicate:
Adding frames
To add a new frame, click on the “Insert frame” button in the toolbar. Alternatively use the main menu Edit → “Insert Frame” or its shortcut “Command”+K.
Then click and drag anywhere within your Canvas to add your frame. You’ll see the frame dimensions in the inspector as you drag.
Hold “Shift” while you click-and-drag to make your frame height and width equal.
Hold “Command” while you click-and-drag to draw your frame from its center (instead of the top-left).
Changing the fill color of the frames
Show the properties inspector and click on the “Color” control. Select the color you want from the colors panel shown. Note that the color of a frame is only visible if it has no image.
How to change frame border color and size
In the properties inspector click on the “Border Color” control. Select the desired color.
If you want to change the border size, just use the slider labeled “Size” in the properties inspector, or use the text field next to it.
The new value will be applied in all selected frames of the spread.
If you want to change the border color or size of all the frames in multiple spreads, just first select them in the navigator.
How to fix the frame position
Click the "Fix Frame Position" checkbox and the selected frames will not be moved when you select another layout solution.
Interactively editing the image inside a frame
Double-click the frame with the image. The frame will enter in image editing mode.
Move the image
Just click on the image and drag to the desired position.
Scale the image
- Use the pinch gesture to scale on a trackpad.
- Use the scroll wheel in a mouse.
- Use the scale slider in the properties inspector.
Rotate the image
- Use the rotate gesture to rotate on a trackpad.
- Use the rotation slider in the properties inspector.
When you finish, click outside the frame, in the button labeled "Stop Editing" or just press the "ESC" key.
Changing the image rotation of a frame
Just select one or more frames, and then use the “Rotation” slider in the properties inspector, or use the text field next to it.
Changing the image scale of a frame
Just select one or more frames and then use the “Scale” slider in the properties inspector, or use the text field next to it.
Changing the opacity of the image inside a frame
Just select one or more frames and then use the “Opacity” slider in the properties inspector, or use the text field next to it.
If the frame becomes fully transparent a dash line will appear at its edges. This border is a visual aid and won't be printed in any case.
How to know the effective resolution of an image inside a frame
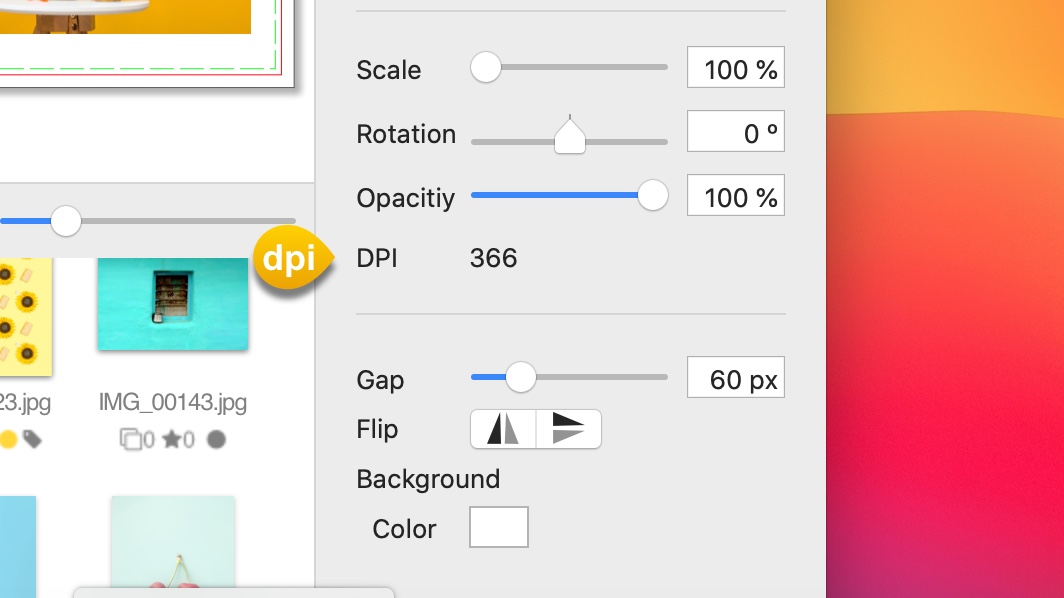
Select one frame and in the properties inspector you will visualize the effective resolution of the image labeled as DPI. If this DPI is below the DPI of the album a warning sign will be shown.
