Album Settings
Dimension Settings
By default, any new album has a predefined dimension settings to start. You can change the dimensions of your album not only before the design process starts but also at any time you need. Of course, the default settings for new albums are also fully customizable. You can change here.
Changing the dimension settings

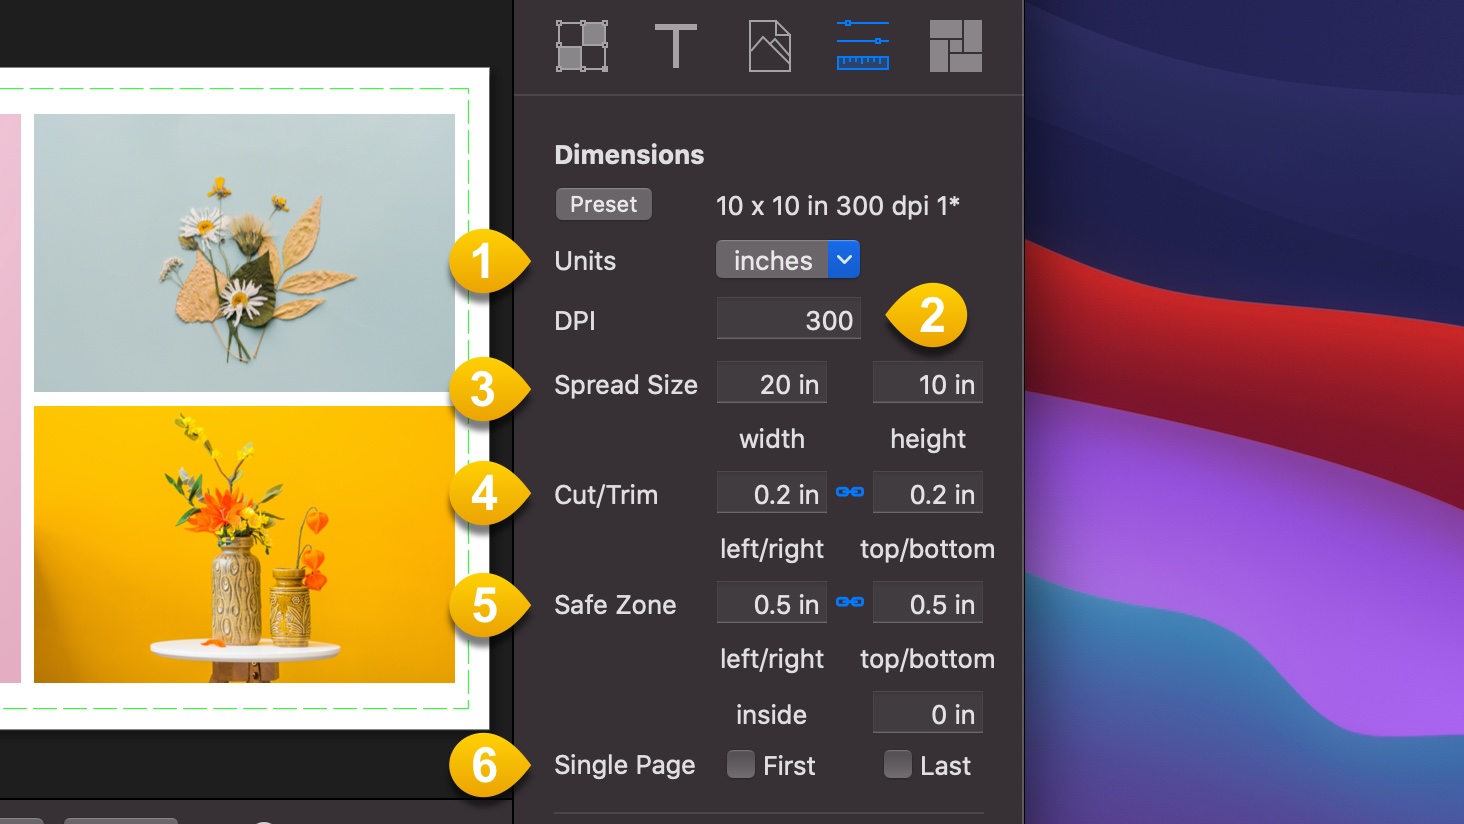
- You can set the dimensions of your album in four Units: Inches, Centimeters, Points or Pixels.
- DPI (dot per inch) resolution can be adjusted from 70 to 600.
- Spread Size: Width is the final full spread width (two pages) including any trim. Height also includes any trim.
- Cut/Trim area as provided by your printing lab. This area will be trimmed from the edges of the spread.
- Safe Zone is usually provided by your printing lab. It's mostly a guide to help you avoid placing images or texts too close to the edges. The safe zone is measured from the edges inward and contains the Cut/Trim size.
- It lets you design an album with (first or/and last) single page.

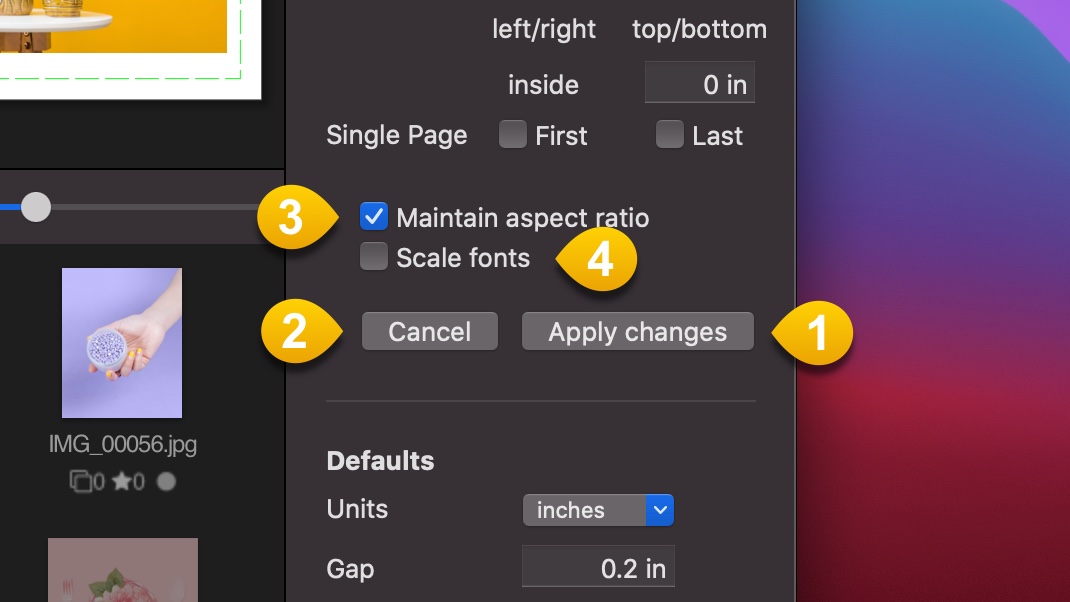
Once you have done customizing the dimensions of your album you can Apply (1) or Cancel (2) the changes. You have two options on how the current frames in your spreads will respond to this changes:
- Maintain aspect ratio: If it’s checked the aspect ratio of your frames won’t change.
- Scale fonts: If it’s checked the texts in your frames will be scaling according to the new size.
In any case the gap between the frames will be kept. If you are not happy with your selected options, Just undo the last operation (Command+Z).
Managing Presets
Adding a new preset
If the current dimension settings shown in the inspector doesn't match with any preset, you have the option to save as a new preset.
Tip: If it is the case, the information of the dimensions setting label will end with an asterisk.
Just click the "Presets" button to access your presets. Then use the add button in the top right corner of the presets list. You can also give it a new name or leave the proposed one.
Using a saved preset
Just click the "Presets" button to access your presets, and select the preset you want. The settings will be copied to the dimensions inspector, and you will have the choice to apply them to your album.
Renaming a preset
Control-click on the name of the preset and choose the option "Rename preset".
Note that the presets provided with maqueteer can't be renamed.
Deleting a preset
Ctrl-click on the name of the preset and Choose the option "Delete preset".
Note that the presets provided with maqueteer can't be deleted.
Setting a preset as the default for new albums
Ctrl-Click on the name of the preset and Choose the option "Set as default for new albums".
Note that the current default preset is marked with a star.
Default Settings
These settings will be applied as default in the new spreads you create. And, if you are starting a new project, in this case, the settings also will be applied to the first blank spread that is created by default.

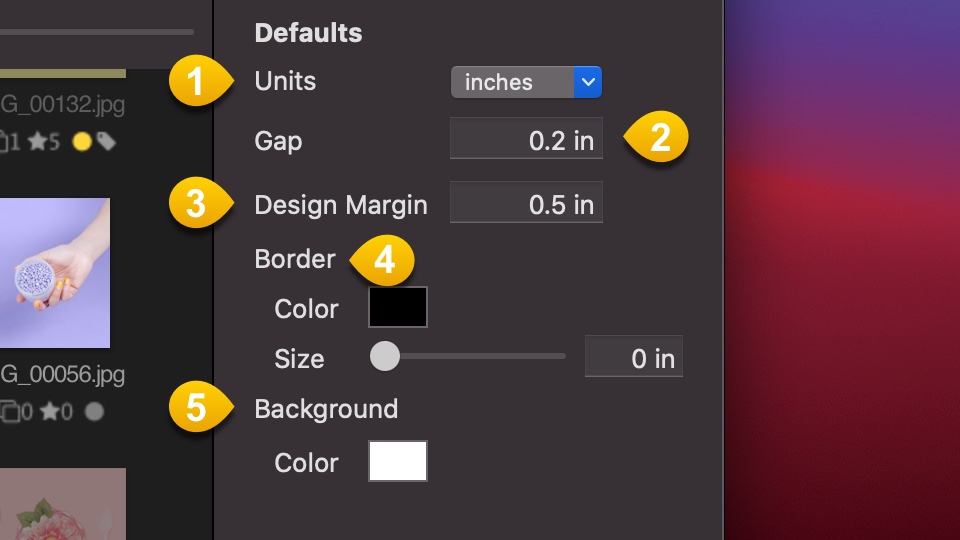
1.- Just use the Units you want to configure these settings.
2.- The gap size between frames.
3.- Design margin: Measured from the Cut/Trim edge inward. It is a guide for the Layout solutions engine. Some solutions will use this margin as a limit for the design, some will use the double value, and some will just ignore it.
4.- You can set the border color and size.
5.- Background color of the spread.